In my previous post, I have introduced you to the new Advanced Firewall Add-on in VMWare Cloud on AWS.
I also covered the Context Aware Firewall feature to filter connection based on the App id and not only the protocol number.
In this post, I am going to cover Distributed FW FQDN filtering to allow applications that communicate outside the SDDC gain layer 7 protection.
Introducing the FQDN Filtering feature
This feature can allow users to only access specific domains by whitelisting and/or blacklisting FQDNs. In many high-security environments, outgoing traffic is filtered using the Distributed firewall. When you want to access an external service, you usually create IP-based firewall rules. In some cases, you don’t know which IP addresses hide behind a domain. This is where domain filters come in handy.
Because NSX-T Data Center uses DNS Snooping to obtain a mapping between the IP address and the FQDN, you must set up a DNS rule first, and then the FQDN allowlist or denylist rule below it.
SpoofGuard should be enabled across the switch on all logical ports to protect against the risk of DNS spoofing attacks. A DNS spoofing attack is when a malicious VM can inject spoofed DNS responses to redirect traffic to malicious endpoints or bypass the firewall

You can define specific FQDNs that are allowed and apply them to DFW policies. Conversely, you can define specific FQDNs that are denied access to applications in the SDDC. The DFW maintains the context of VMs when they migrate. You can then increasingly rely on application profiling and FQDN filtering to reduce the attack surface of their applications to designated protocols and destinations.
Configuring DFW with FQDN filtering
In this section, I will show you how to setup a FQDN Context Profile, and a Firewall policy to limit access to specific URLs from VMs.
Creating a FQDN Context Profile.
First thing first ! Let’s create the context Profile.
Under Networking and Security, in the Inventory section, click Context Profile.

Click FQDNs Tab
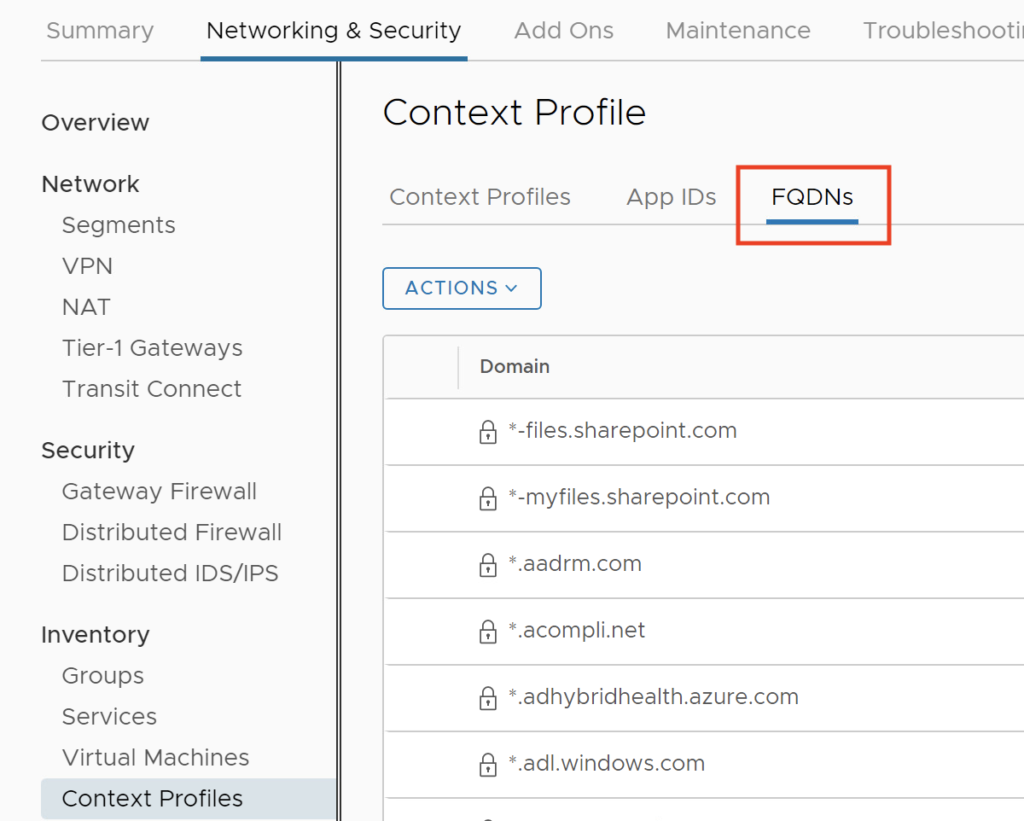
Click ACTIONS –> Add FQDN
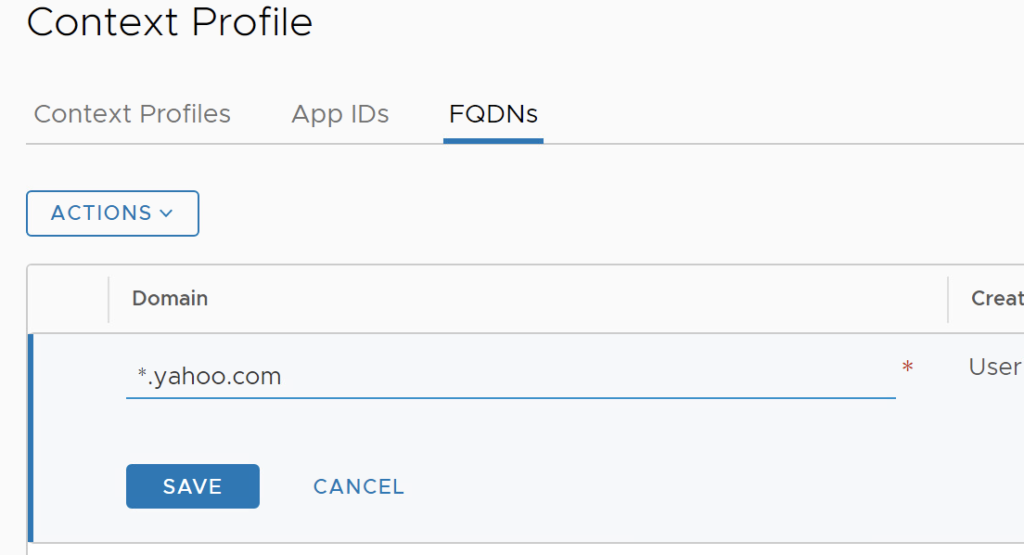
Enter the Domain: *.yahoo.com, and then Click SAVE.
Create a second FQDN with *.google.com.
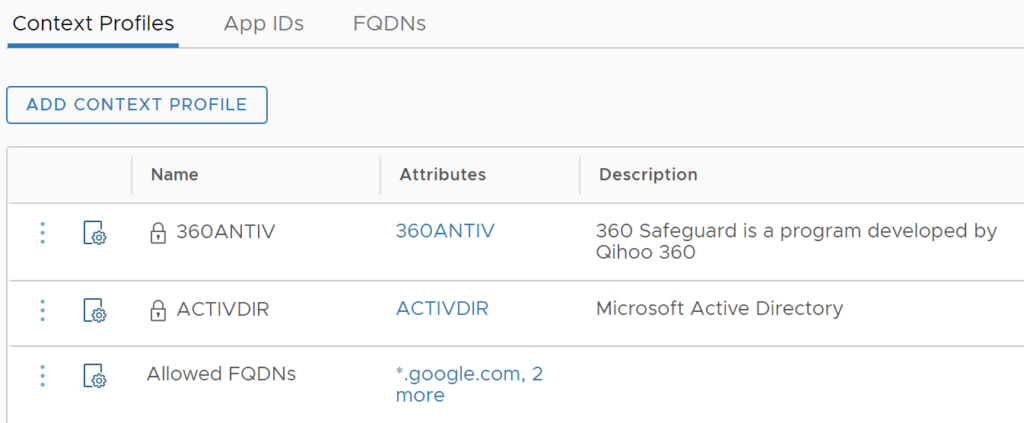
Click the Context Profile Tab, and Click ADD CONTEXT PROFILE
Give it a Name: Allowed FQDNs, Click Set
Click ADD ATTRIBUTE –> Domain(FQDN) Name

Select the following domains: *.yahoo.com, *.office.com, *.google.com and Click ADD.

Click APPLY, Click SAVE. We now have a Context Profile setup.
Creating a Firewall rule and a Policy
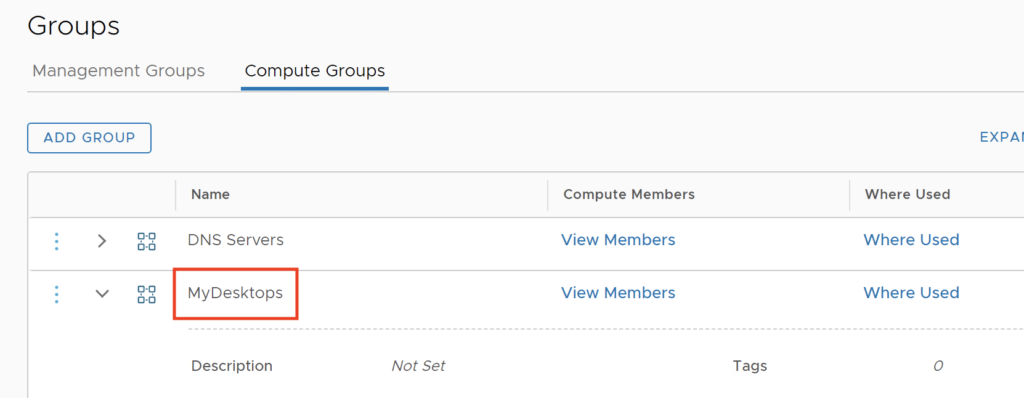
I have created a Group called MyDesktops which includes a segment with my Windows VMs.
Now I am going to setup a Firewall Policy including this Context Profile. I will limit my VM in the MyDesktops group to access to the Allowed FQDNs. Also I limit access from this Group of VMs to specific DNS servers (8.8.8.8, 8.8.4.4).

I also add a Drop rule at the end to limit access to only the FQDNs that were whitelisted.
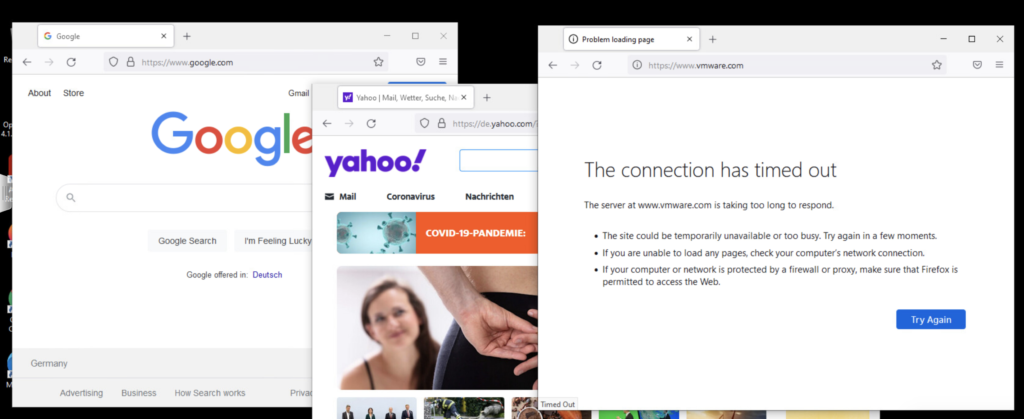
Now I am allowed to access google.com and Yahoo.com but I can’t connect anymore to the vmware.com site.
This concludes the post on FQDN Filtering. In my final post, I will cover the Distributed IDS/IPS feature.
2 thoughts on “NSX Advanced Firewall Add On for VMware Cloud on AWS (Part 2)”