HCX MON Policy routes

I recently have had a question from a customer asking me how the default route is managed into HCX when Mobility Optimized Network is enabled.

Basically when extending multiple VLANS from on-premise to VMware Cloud on AWS by leveraging HCX, you may still want to send egress traffic to an on-premise security device in order for the workloads running in the SDDC to be protected.

I decided to check the way HCX is managing default gateway in my own on-premise lab.

Testing the default gateway with MON

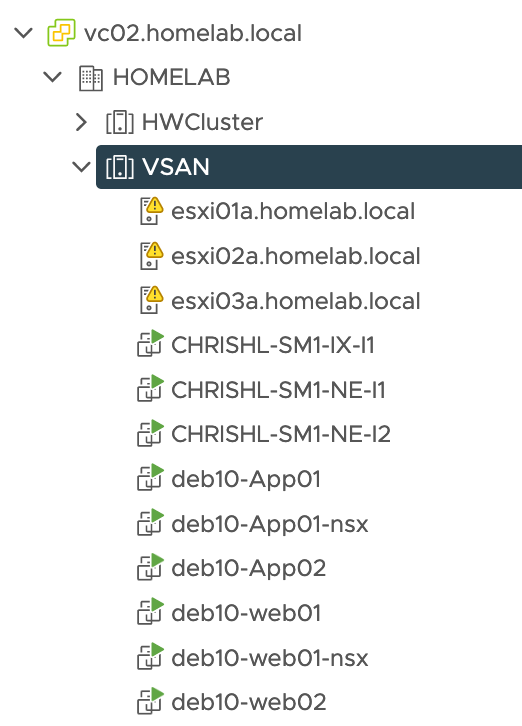
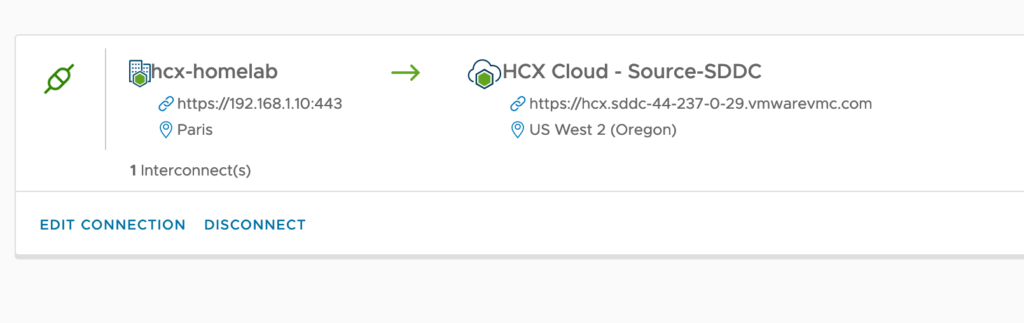
I have a VMware vSphere lab environment with a 3 nodes VSAN cluster which is link via Internet to an SDDC that I have deployed with Terraform on our internal CSA Organisation. I have already established site pairing between both sites:

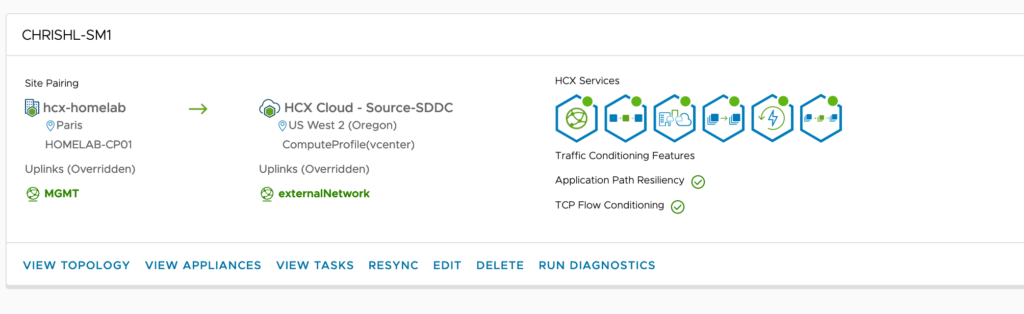
And created a service mesh:

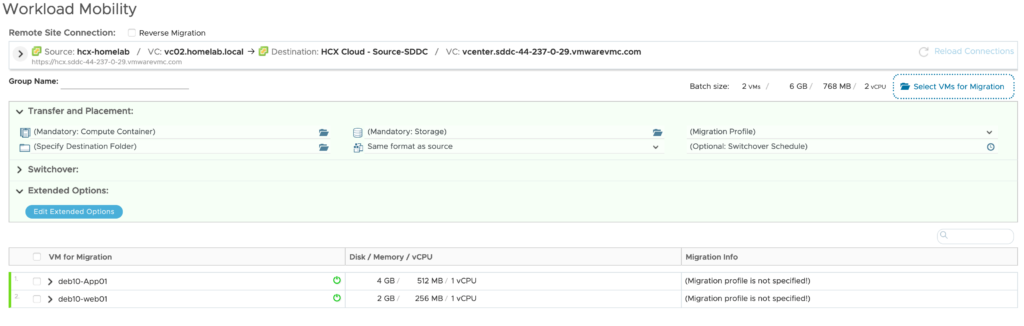
Then I have extended 3 networks to the VMware Cloud on AWS SDDC: APP (VLAN 1712), DB (VLAN 1713) and WEB (VLAN 1711).

Two extended networks are MON enabled: APP and WEB.

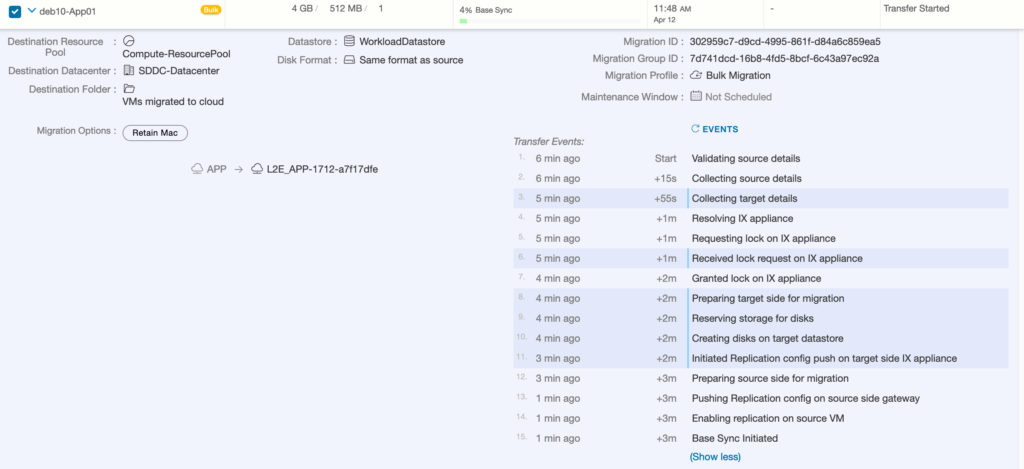
On the APP network (VLAN 1712), I have deployed one VM (DEB10-APP01) which is running in my VSAN on-premise 3 nodes cluster. This network Extension hasn’t MON feature enabled.

I have also setup a second subnet called WEB(VLAN 1711). I have another VM (DEB10-WEB01) running there, which have been migrated on a new cluster in VMware Cloud on AWS. This extended network is MON enabled.

I have open a shell session and try to ping the on premise VM DEB10-APP01 from DEB10-WEB01. The trafic is flowing over the internet to my on-premise site through the service mesh:

This is a ping between my VM in SDDC (WEB, 172.11.11.105) to on-premise VM (172.11.12.107, APP)

Now I wanted to check where the default route is in the SDDC. Is it going to be the IGW through the T0 router or is it going to be the on-premise gateway?

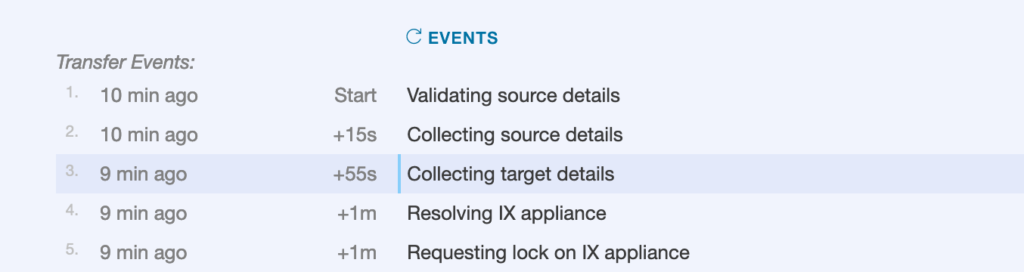
To check, I have traceroute to the 8.8.8.8.

This is not using my on-premise gateway to egress traffic. However default traffic is going out through the T0 router and internet gateway of the SDDC in AWS.

So now how can I make traffic on a MON enabled network to egress via on-premises?

How the HCX MON Policy routing works?

How HCX MON Policy routing works is very simple. When MON is enabled on a network extended segment, HCX adds the gateway IP with /32 net mask into the SDDC Compute Gateway. For each VM that has MON enabled there is also a /32 route injection for created or Migrated Virtual Machines. So whenever a Virtual machine on the different segment in the SDDC wants to reach the VM it will allow reachability from SDDC Compute Gateway.

There is a default setting in the Policy routing that is evaluated whenever a destination is not within the SDDC:

If the destination IP is matched in the policy and allowed by the policy, the trafic is forwarded to the on-premise gateway. If the destination IP is not listed in the policy settings then the traffic is sent to the T0 router in the SDDC and routed accordingly.

Changing the HCX MON Policy routes

This setting can however be changed by editing it through a menu available from the ADVANCED tab in the console:

The default MON Policy setting is, as displayed, allowing only RFC-1918 subnets to be routed back to on-premise gateway :

Only private subnet traffic is forwarded to the on-premise router. Internet egress is sent to the SDDC Compute Gateway.

To change the default policy routing to route default egress traffic to on-premise, you simply have to add a 0.0.0.0/0 route in the list as allowed.

The default route is now displayed in the policy Routes setting:

Default route means that Internet traffic will flow over the Interconnect from SDDC to the on-premise gateway.

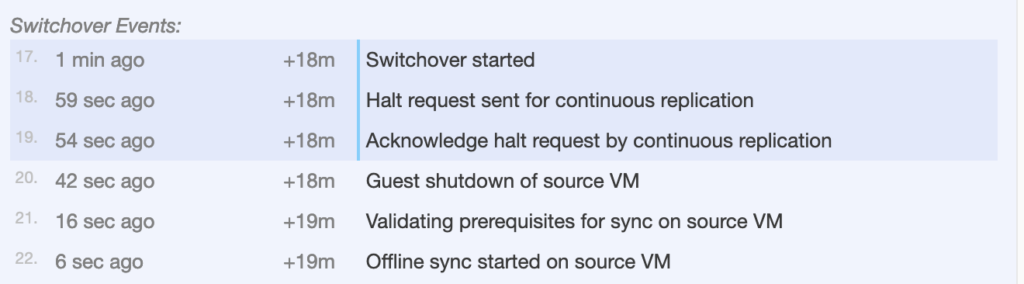
Let’s check it by launching a traceroute again from my VM in the SDDC:

It shows now that the traffic is sent to my on-premise default gateway (192.168.2.1).

Conclusion

When you have MON enabled with the default route policy settings and you are advertising 0.0.0.0/0 into the SDDC, HCX ignore this and still send traffic out of the IGW.

Whenever you advertised the default route to the SDDC through BGP, you must change the default Policy to avoid egress traffic to be sent to the Tier-0 router, otherwise you will experience asymmetric routing.

HCX Migration Event Details

As mentioned in my previous post, I have updated my HCX server to very latest version 4.0. Now it’s time to test some of the new features including the Mobility Migration Event details.

Introduction

Before we jump into a demonstration let’s quickly recap what the Mobility Migration Event Details feature provides:

  • It provides a detailed migration workflow information and it shows the state of migration and how long a migration remains in a certain state as well as a long a migration has been succeeded or failed.
  • It provides the detailed information for individual Virtual Machines that has been migrating from source to destination site. It’s working for Bulk Migration, HCX RAV, and OS Assisted Migration.

So now let’s see how the procedure works.

Procedure and Tests

I decided I am going to migrate two VMs back from my on-prem Lab to VMC on AWS. The two VMs are deb10-App01 and deb10-web01.

As you can see, I have already created a site paring between my source on-prem Lab and VMC on AWS datacenter.

I have also established a Service Mesh between my on-premise lab environment and one of the Lab SDDC.

The Service Mesh is established between my lab and VMC. I have enabled Application Path Resiliency and TCP Flow conditioning

The Service Mesh is a construct that associate two Compute Profiles.

Now let’s select the VMs for migration. For this exemple, I have chosen to migrate two VMs with the Bulk Migration option.

In order to launch the migration, I have to click on Migrate.

Next I am going to select the VMs I want to migrate.

I clicked the add button to move VM to a Mobility Group.

I now have to provide the information for Transfer and Placement. So basically I have selected the only possible resource pool = Compute-ResourcePool and datastore = WorkloadDatastore. I also switch the migration profile to Bulk Migration and the Folder to VMs migrated to Cloud.

Next Step is to validate the migration option by selecting the two VMs and clicking the Validate button.

The result display a few warnings only related to the VMtools I have installed into my Debian 10 VMs but the validation is Successful.

So I am gonna go ahead and start the migrations by clicking the green Go button.

and confirm it by clicking Validate.

In the beginning it shows only 0% BAse sync as the process starts.

We can click on the group info to see more information.

If I click on the group itself I can the see the list of Virtual Machines that are migrated.

After a few seconds we are starting to see the first event in the windows. If I click on individual VMs I can see the detailed events that is happening as the migration is taking place.

On the lower hand inside, you can see there is a separate section that provides the event information.

This section is divided in multiple part. Currently we see the Transfer Events section. There is a specific color coding there to distinguish tasks that are running on-premise and the one on destination. The darker blue shows the information collected on the target site.

It is possible to update regularly the list of events by clicking on EVENTS.

As the Base Sync in initiated, we can see the remaining time that’s stay to transfer the virtual machine. This is really handful when the size is very large to be aware of the time remaining to complete the transfer.

As the transfer event finishes, meaning the transfer of the VM is completed, we now see a Switch Over events section. This is visible for all of the Virtual Machines.

We can confirm that the switch over is ongoing from the first line.

After the witch over is finished, the latest events are Cleanup Events.

If I go back the Group Info, it shows me that on migration is finished and the other one is ongoing.

All the details of events is now listed in all sections.

All my Virtual Machines are now migrated and we saw a detailed events and real state of the migration of individual VMs.

This concludes this post thank you for watching it.

HCX 4.0 is now available.

A new version of my favorite solution for migrating to the Cloud has been recently released and I can wait to test it.

Let’s have a look at it…

What’s new in HCX 4.0

First of all what is on the list of new features for this version, there are multiple great enhancements around Migration, Network Extension, Service Mesh configuration and Usability.

Migration Enhancements

  • Mobility Migration Events details: The HCX Migration interface will display detailed event information with time lapse of events from the start of the migration operation.
  • NSX Security Tag Migration: Transfers any NSX Security tags associated with the source virtual machine when selected as an Extended Option for vSphere to vSphere migrations. See Additional Migration Settings
  • Real-time Estimation of Bulk Migration – HCX analyzes migration metrics and provides an estimation of the time required to complete the transfer phase for every configured Bulk migration. The estimate is shown in the progress bar displayed on the Migration Tracking and Migration Management pages for each virtual machine migration while the transfer is in underway. For more information, see Monitoring Migration Progress for Mobility Groups.
  • OS Assisted Migration Scaling – HCX now supports 200 concurrent VM disk migrations across a four Service Mesh scale out deployment. A single Service Mesh deploys one Sentinel Gateway (SGW) and its peer Sentinel Data Receiver (SDR), and continues to support up to 50 active replica disks each. In this Service Mesh scale out model for OSAM, the HCX Sentinel download operation is presented per Service Mesh. See OS Assisted Migration in Linux and Windows Environments.
  • Migrate Custom Attributes for vMotion  – The option Migrate Custom Attributes is added to the Extended Options selections for vMotion migrations. 
  • Additional Disk Formats for Virtual Machines – For Bulk, vMotion, and RAV migration types, HCX now supports these additional disk formats: Thick Provisioned Eager Zeroed, Thick Provisioned Lazy Zeroed. 
  • Force Power-off for In-Progress Bulk Migrations – HCX now includes the option to Force Power-off in-progress Bulk migrations, including the later stages of migration.

Network Extension Enhancements

  • In-Service Upgrade – The Network Extension appliance is a critical component of many HCX deployments, not only during migration but also after migration in a hybrid environment. In-Service upgrade is available for Network Extension upgrade or redeploy operations, and helps to minimize service downtime and disruptions to on-going L2 traffic. See In-Service Upgrade for Network Extension Appliances
  • Note: This feature is currently available for Early Adoption (EA). The In-Service mode works to minimize traffic disruptions from the Network Extension upgrade or redeploy operation to only a few seconds or less. The actual time it takes to return to forwarding traffic depends on the overall deployment environment.
  • Network Extension Details – HCX provides connection statistics for each extended network associated with a specific Network Extension appliance. Statistics include bytes and packets received and transferred, bit rate and packet rate, and attached virtual machine MAC addresses for each extended network. See Viewing Network Extension Details.

Service Mesh configuration Enhancements

HCX Traffic Type Selection in Network Profile – When setting up HCX Network Profiles, administrators can tag networks for a suggested HCX traffic type: Management, HCX Uplink, vSphere Replication, vMotion, or Sentinel Guest Network. These selections then appear in the Compute Profile wizard as suggestions of which networks to use in the configuration. See Creating a Network Profile.

Usability Enhancements

  • HCX now supports scheduling of migrations in DRAFT state directly from the Migration Management interface.
  • All widgets in the HCX Dashboard can be maximized to fit the browser window.
  • The topology diagram shown in the Compute Profile now reflects when a folder is selected as the HCX Deployment Resource.
  • In the Create/Edit Network Profile wizard, the IP Pool/Range entries are visually grouped for readability. 

Upgrading from 3.5.3 to 4.0

The process is straightforward. You just have to go to the HCX console and check the System Updates.

Click the Version on the list of available version to start updating. This will begin by updating the HCX Manager.

Once you have upgraded the HCX Manager, the HCX Network Extension appliances and Interconnect Appliances have to be upgraded.

For that we have to switch to the Service Mesh and Select Appliances Tab. On the right columns ‘Available Version’ you will see the latest build number available : 4.0.0-17562724 with a small flag NEW!

Now you just have to select the appliances (don’t select WAN Optimization as it will updated differently) and click UPDATE APPLIANCE.

I selected the Interconnect (IX) and choose UPDATE APPLIANCE

A confirmation window with a warning message that is recapping the process is displayed. Just select the Force Update appliance and Click UPDATE button.

A message confirming the launch of the upgrade is displayed.

This message is confirming the process starts and also that the remote appliances will be upgrade as well

After a few seconds, the process starts updating the appliance and you can see the successive tasks and operations in the vCenter Recent Tasks.

First of all it will deploy the new appliance from the OVF

Just after you will see that the appliance is reconfigured.

Step 2 is reconfiguring the appliance

Next the system will finish the update job and power on the newly deployed appliance.

The Tasks tab of the Service Mesh in HCX Console is also detailing in real time all the required steps followed by system to upgrade the appliance.

This window is showing the Network extension tasks

A the end of the operation, you can confirm that all tasks completed successfully if they have a green arrow on the left.

The final result for the IX appliance (Interconnect) with all successful steps

A confirmation that the process is finished successfully will also appear in the console.

You can confirm the process has been successful by reading the Upgrade complete message

Keep in mind that when you want to Start updating your appliance, it also upgrade the remote peer sites (could be a Cloud target like VMC on AWS or AVS or a target vCenter environment like VCF).

All my Appliances are now upgraded and tunnels shows as Up in the console.

Now that I have finalised the upgrades it’s time to evaluate the cool new features. I invite you to discover it in my next post!