When I look back I realise I have been working at VMware for about 9 months and I have spent a tremendous amount of time dealing with a high number of requests, questions and issues with my customers.
One that particularly stands out is around integrating VMC on AWS with a Firewall hosted in a transit VPC for security purpose.
One of my customer recently was asking me if it was possible to create a VPN from VMC to a WatchguardTM Firebox Cloud Firewall. So I decided I would give it a try.
In this guide, I will first show you how to set up a route-based VPN from the WatchguardTM firewall to an AWS VGW in a native VPC.
In the last part, I will show how to configure an IPSEC route-based VPN from VMC on AWS to the same instance of WatchguardTM firewall hosted in a transit VPC.
Network Architecture diagram
AWS Deployment phase
Phase 1 -Configure an AWS transit VPC
Let me give first some definition: A virtual private cloud (VPC) is a virtual network dedicated to your AWS account. It is logically isolated from other virtual networks in the AWS Cloud. You can launch your AWS resources, such as Amazon EC2 instances, into your VPC.
First, I need to configure an AWS VPC with at least two subnets. It’s possible to use the VPC Wizard to create a VPC with public and private subnets or create it manually.
If you choose the wizard, you will have to terminate the NAT instance that was automatically created for the VPC by the VPC Wizard because the instance of Firebox Cloud will provide NAT functions for subnets in this VPC.
I will be using the manual method:
Create a new VPC
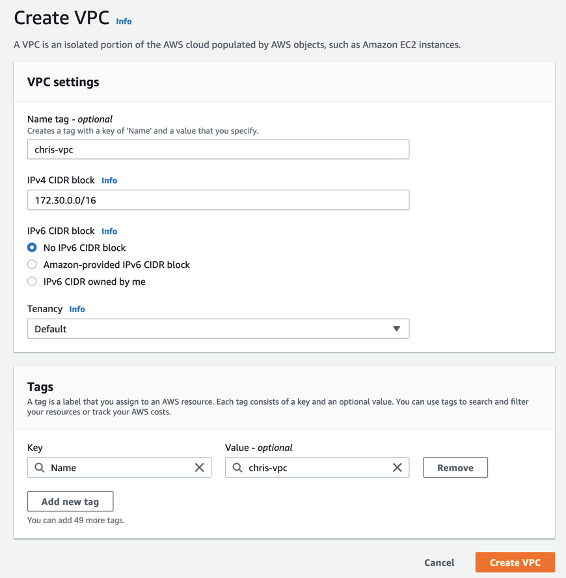
When I create a VPC, I must specify a range of IPv4 addresses for the VPC in the form of a Classless Inter-Domain Routing (CIDR) block. I decided to choose a CIDR block for my VPC of 172.30.0.0/16.
Now I will have to Create a public subnet with a CIDR block equivalent to a subset of the VPC CIDR range:

Choose a CIDR block for your public subnet like 172.30.11.0/24.
CREATE A PRIvate Subnet
Next step is to Create a private subnet from the VPC CIDR range in the same zone as the public subnet (CIDR block of private subnet cannot overlap with public subnet):
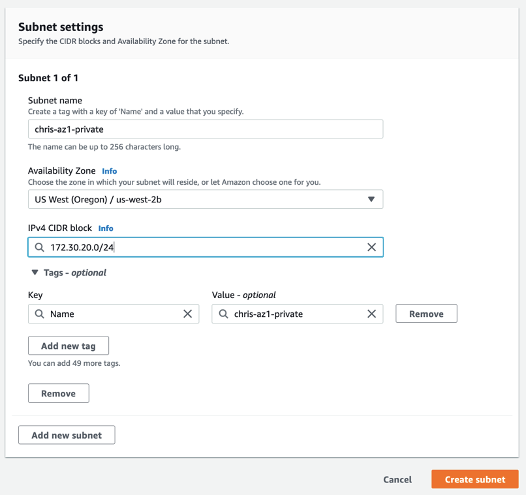
Choose a CIDR block for your private subnet like 172.30.20.0/24.
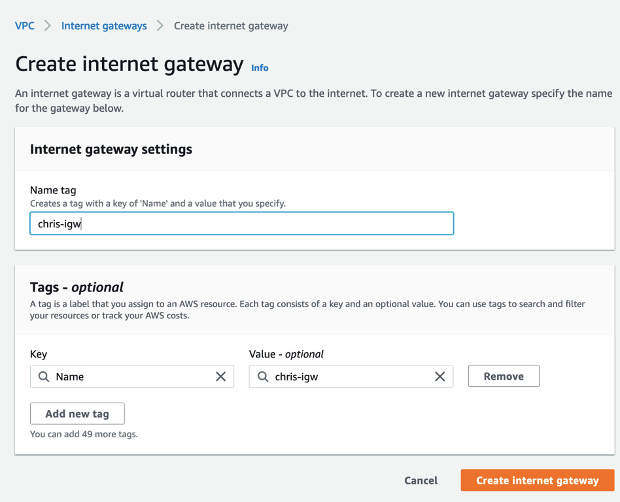
Create an Internet Gateway
We will now deploy an AWS Internet Gateway (IGW) from the VPC Dashboard. From the VPC Dashboard, Click Internet Gateways menu on the left:
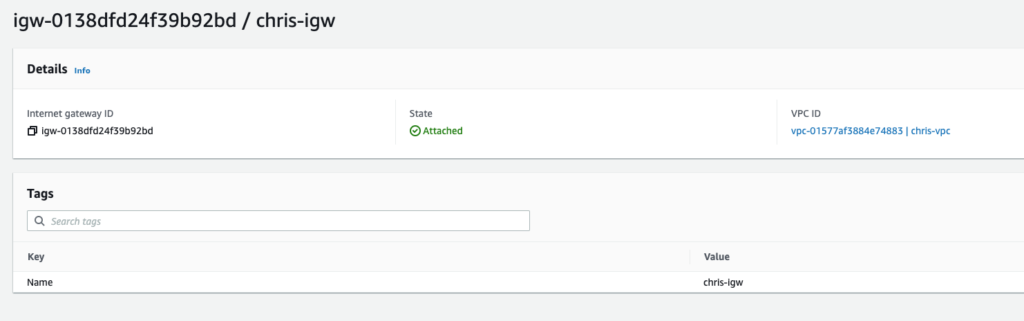
Attach the new IGW to the transit VPC by clicking on the attach to VPC button and from the Actions drop-down menu, select the transit VPC and Click Attach.
The IGW is seen as attached to the VPC that was created:
Create a Route Table
Next, we will create a route table for the Transit VPC: from the VPC Dashboard, select Route Tables menu and Create Route table as shown:
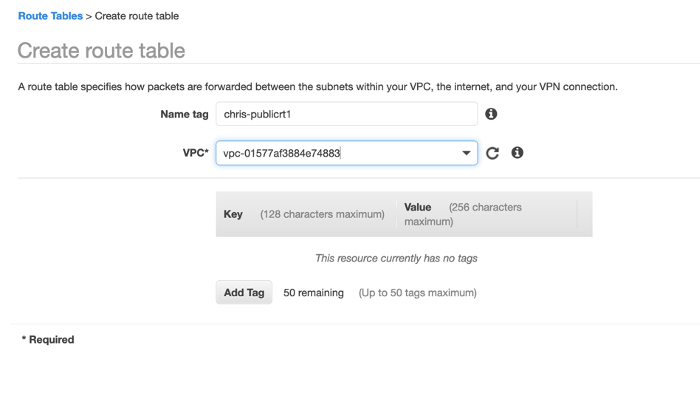
The route table must be associated with the transit VPC as highlighted above. Once you provide a name for the route table and select the Transit VPC from drop-down menu, Click Create.
Next step is to create a default route for the new transit VPC route table. Select the Routes tab and Click Edit.

Add a 0.0.0.0/0 destination that point to the IGW previously created.
Next, from the same window, select the subnet associations tab and select the Edit Button and Select the public subnet created earlier. Once done, click Save.

Next you are going to Create a native “spoke” VPC (this is a VPC attach to the firebox through a VPN where we will run some EC2 instances to test access to the SDDC):
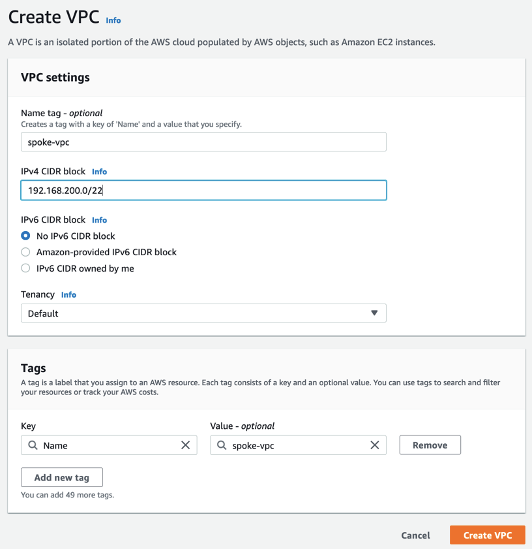
This is the end of this Part 1.
In Part 2 we are going to deploy the Watchguard VM in the transit VPC.
One thought on “Configure VPN from VMC to WatchGuardTM Firebox Cloud – Part 1”