In the first post of my series on Using vCDR to protect VMs in an existing SDDC, I have showed you how to configure an existing SDDC as a Protected Site.
Next thing to do is to start selecting the list of VMs running into the cloud that you want to protect with vCDR in a Recovery SDDC.
Protecting VMs running in the SDDC
It’s possible to protect VMs with vCDR by leveraging the concept of Protection group.
A Protection Group helps create a collection of VMs replicated to the cloud which can be then used as a group for recovery. You can create multiple groups of VMs through multiple Protection Groups.
Create a Protection group
Creating a Protection Group is very simple!
I have just clicked on the button Create protection group from my SDDC in the Protected sites menu.

I am then presented with a wizard to name the Protection Group, select my source SDDC vCenter and define Group membership.

In order to select the list of VMs, I have to create one vCenter query that defines the protection group’s dynamic membership.
A vCenter query is defined using:
- VM Name pattern: a name pattern is a regex entry that supports wildcard and exclusion
- VM Folder: a folder where my VMs run
- VM Tags: vSphere Tags for quickly identifying the logical membership of VMs
The vCenter queries are evaluated each time a snapshot is taken and define the contents of the snapshot.
There is an option to use High-frequency snapshots. This option is really interesting as it brings RPO to as low as 30 minutes and allow for 48 snapshots a day.
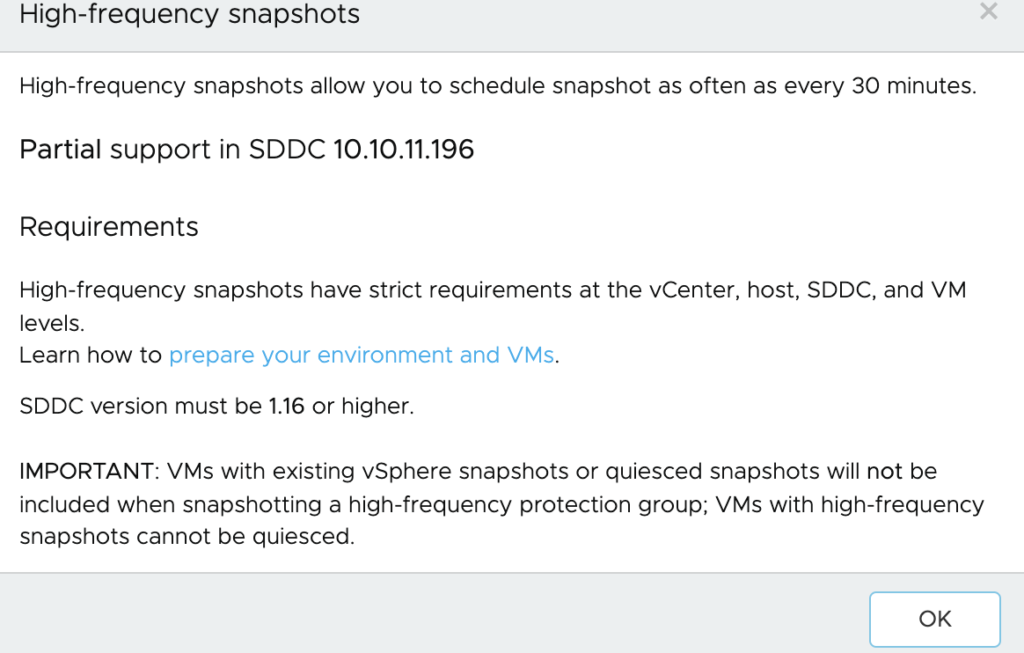
There are a few caveats for enabling hfs such as vCenter and ESXi host version that must be updated to vSphere 7.0u2c+.

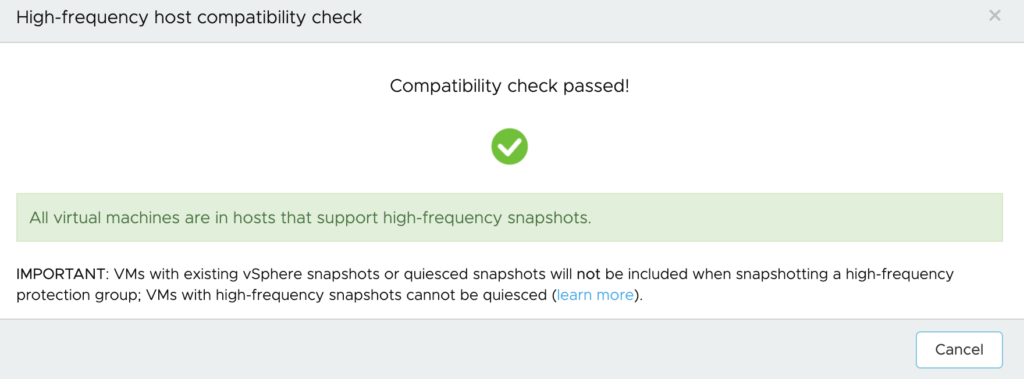
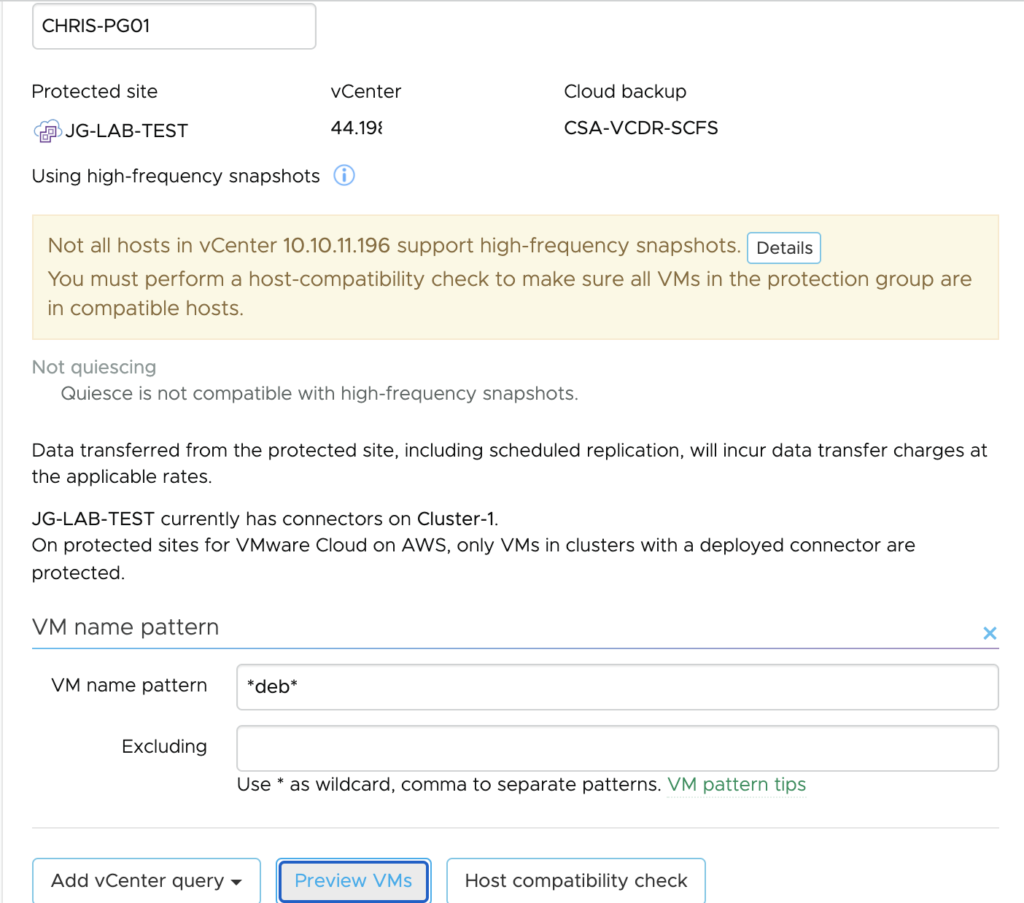
I was able to select it with the current version of my SDDC after launching a compatibility check.
I choose the following pattern for my VMs : *deb* in order to pick only my test Debian VMs.
I checked by clicking on the Preview VMs button.
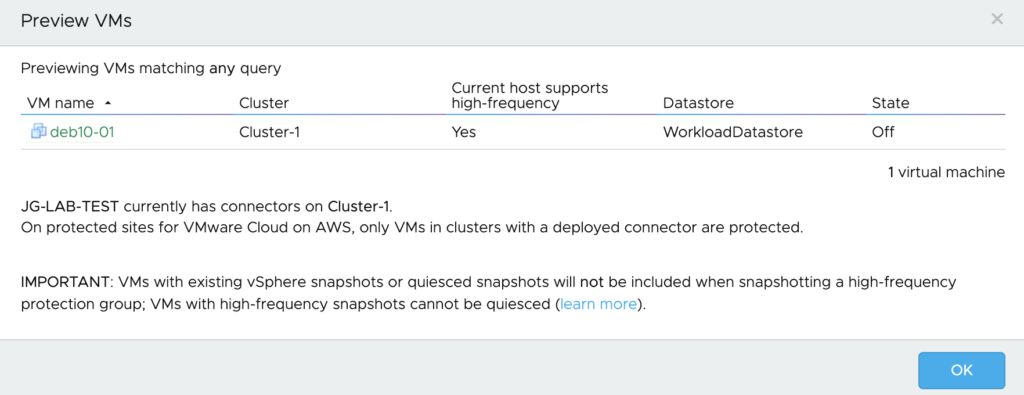
It is important to mention that any additional VMs that are going to match that pattern will be automatically added to the group.
I can also do the same by selecting a VM folder.

Setting up a backup Policy
Once you have your VM selected, next step is to define a backup Policy with specific snapshot/replication schedule and retention time.
Snapshot schedule will define how frequently you want to take snapshots of the VMs defined in the group. You also define how long you want to retain those snapshots on the SCFS by selecting the right retention time.
I have been doing a lot of backup solution configuration in my past job as a EMC technical Consultant and I remember a few best practices that I wanted to share with you.
Forming a good Backup Strategy, you would implies
- Determine what data has to be backed up
- Determine how often data has to be backed up
- Test and Monitor your backup system
From the backup perspective and in order to fulfil common RPO needs, I have established the following schedule (it has to be adapted to workloads criticality):
- 4 hours with 2 Days retention
- Daily with 1 Week retention
- Weekly with 4 Weeks retention
- Monthly with 12 Months retention
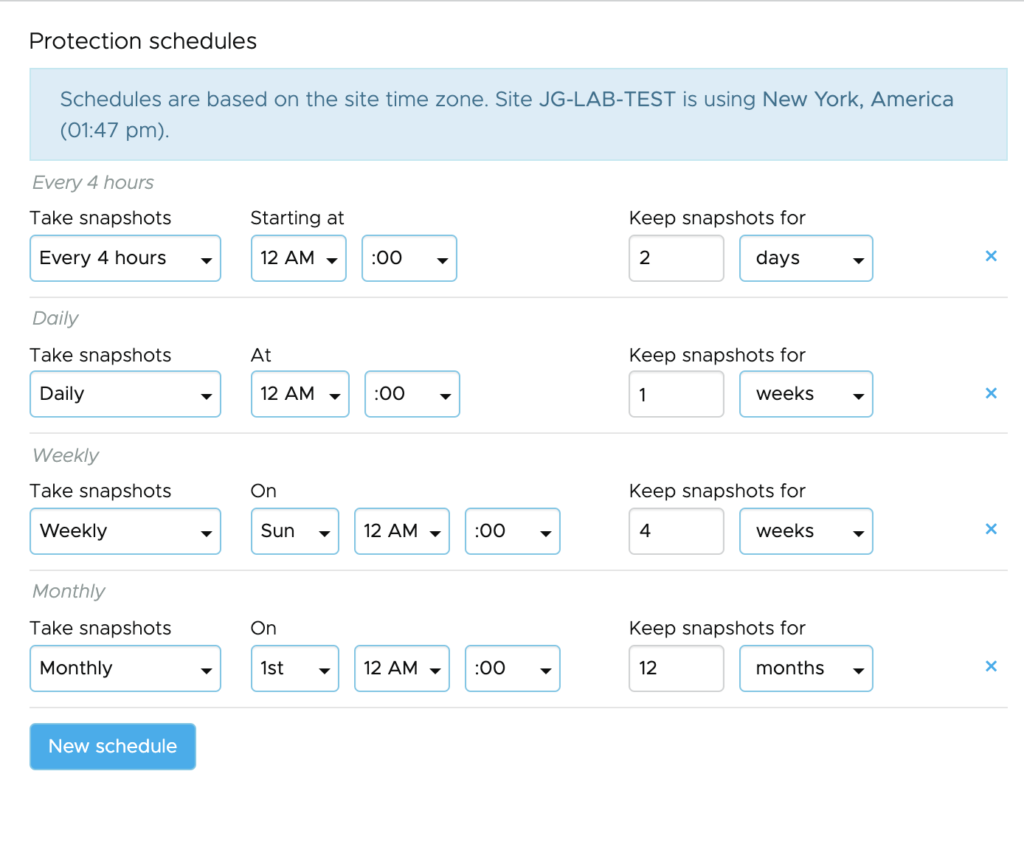
The minimum replication (best RPO possible) is 30′ but here I didn’t choose this frequency. The more you replicate, the more you keep it in the cloud, the more capacity you would need on the cloud site for recovery perspective.
Important: Research indicates most victims of ransomware don’t discover that they have been compromised until an average of 3-6 months after the initial infection, so choose the retention period accordingly.
Once you have defined your replication strategy and protection schedule for your group of Virtual Machines, the snapshots/replicas are going to start populated in the protection group.
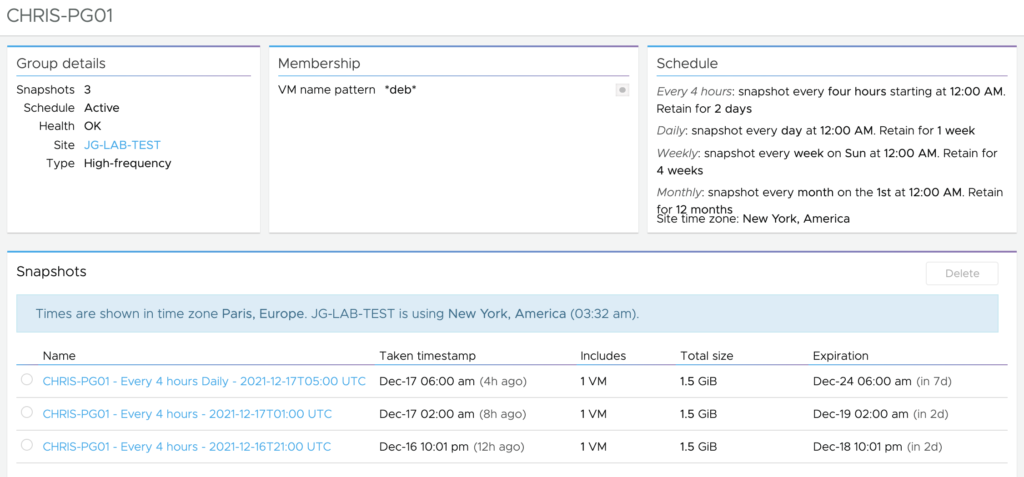
I can click on any snapshots and see the VMs inside.

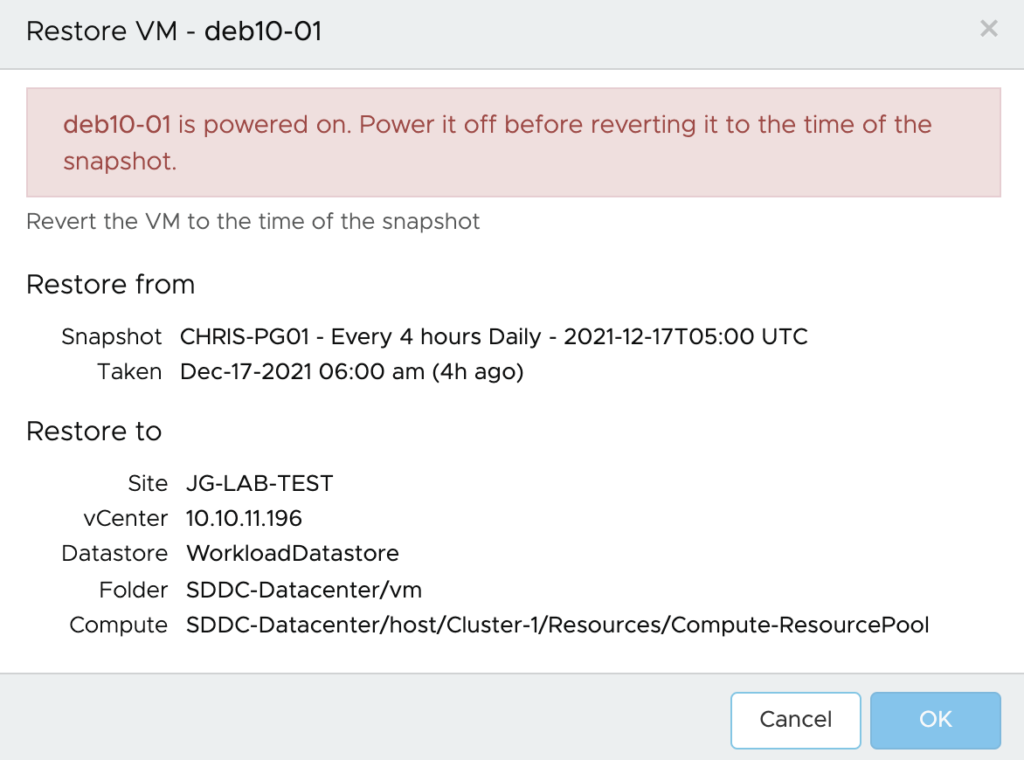
I have the option to restore any image of my VM back to on-premise. This an image level backup so this is going to overwrite the VM on-premise. So the VM has to be powered down before doing so.
Configuring a recovery SDDC
VCDR provides two deployment methods for recovery SDDC.
- On-demand: also known as “just in time” deployment
- Pilot Light: a small subset of SDDC hosts ready to take over the VMs in case of a DR for workload with lower RTO needs
For this post, I already have configured an SDDC in a different region and AZ for the purpose of recovering my test VMs.

As you can see there is a single host in it. It always possible to scale it up and add additional hosts in it. You can always create a single node SDDC for DR testing and then scale it up later.
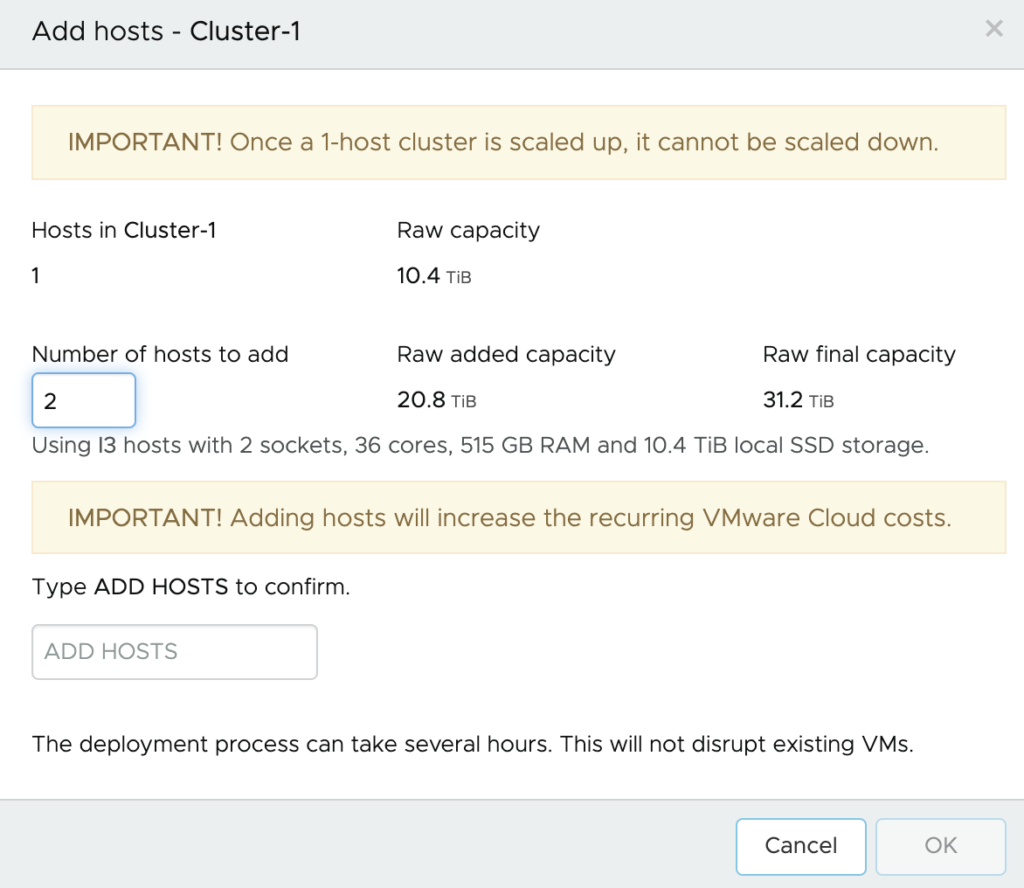
You can also customize the recovery SDDC from here by adding new network segments, Compute Gateway FW rules, NAT rules or new Public IPs for instance.

To bring every thing together and finalize the DR Strategy, I need to create a DR Plan and test it.
I will cover that in the final post of my series.
2 thoughts on “Using VMWare Cloud DR to protect VMs in an SDDC. (Part 2 – Protecting VMs)”